Animate Lab Exercise #9: Creating
Timeline Animation in Flash
Prerequisites:
1. Create a folder on
your desktop called chapter9.
2. Detach and unzip the chapter9Part1
Flash file. Place the Flash file inside your chapter9 folder.
3. Detach and unzip the chapter9Part2
Flash file. Place the Flash file inside your chapter9 folder.
4. Detach and unzip the chapter9Part3 Flash file. Place the Flash file inside your chapter 9
folder.
Part 1 Requirements:
1. Open the Animate Flash file- chapter9Part1.fla
Note: Attached is a sample of the Animate Flash
output file- Chapter9Part1_output.html.
Timeline has 260 frames at
24 fps. Length of timeline is 10.8 secs
2. Open the Library
Panel. From the Main Menu, select
Windows-> Library Panel. Drag the
panel beside the Properties tab.
3. Create a Frame-by-Frame
Animation in the “alienship” layer
a. In frame 1 of the alienship layer, copy and drag the alienship.png from the
Library panel to outside of the stage.

b. Right click on the bitmap image and select Convert to Symbol.
Name the symbol as “alienship” and select “Graphic” as the symbol type.
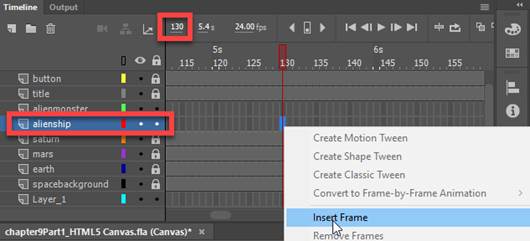
c. In the alienship layer, go to frame 130 and insert
regular frames.
d. Go back to frame 1 of the alienship layer, right click and
select “Convert to Frame-by-Frame Animation”
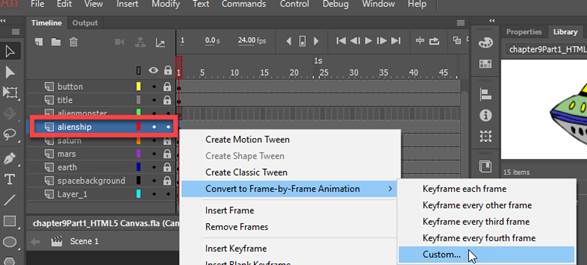
e. Enter 15 and
click on OK.

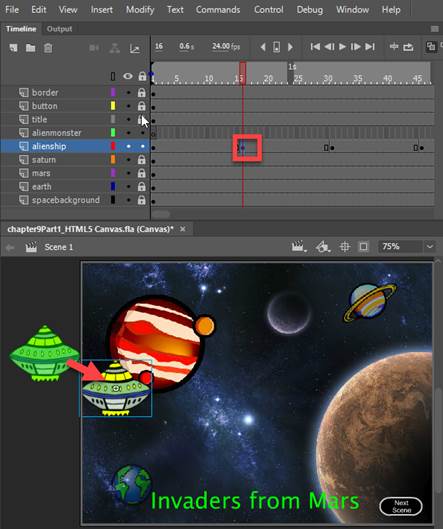
f. Go back to frame 1
of the alienship layer, make sure the red marker is at frame 1.
Turn on “Onion Skin” by
clicking on icon.
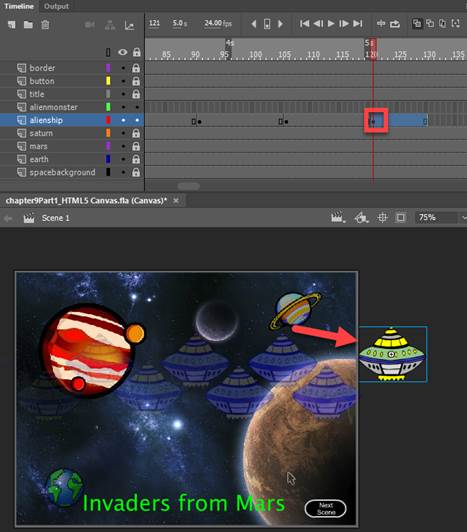
g. Go to frame 16 and move the alienship symbol to the new
position on the stage as shown below.
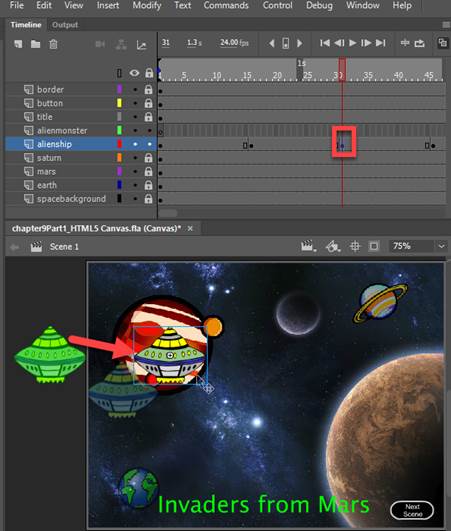
h. Go to frame 31
and move the alienship symbol to the new position on the stage as shown below.
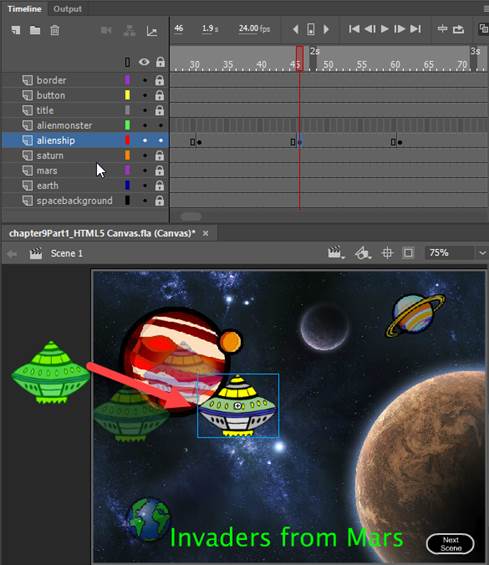
i. Go the frame 46
and move the alienship symbol to the new position on the stage as shown below.
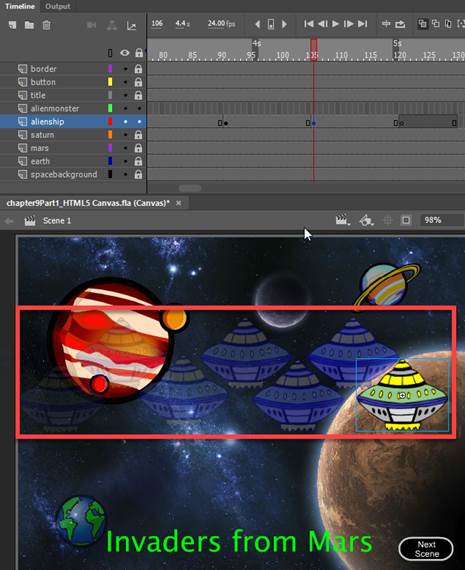
j. Repeat the same steps in
moving the alienship symbol at frame 61, frame 76, frame 91, and frame
106
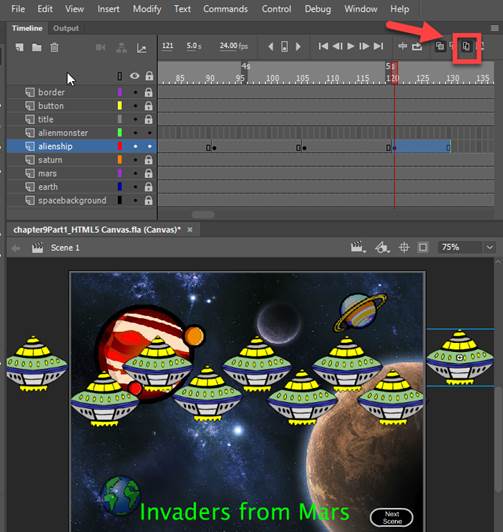
Below is Onion Skill of the positions of the symbol along the timeline in the
alienship layer.
k. For the last keyframe 121, move the alienship symbol to
off the stage as shown below
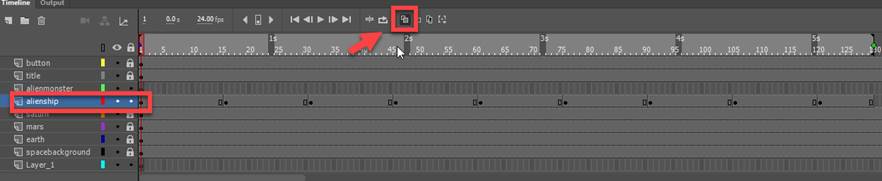
l. Use the Edit Multiple
Frames to re-position the alienship symbol in each keyframe
Click on the Edit Multiple Frames
icon.
After you finish re-positioning the
symbol in the keyframes, turn off the Onion Ring and Edit Multiple
Frames by unclicking the button.
4. Create a Motion Tween for the “alien monster” symbol on the
timeline.
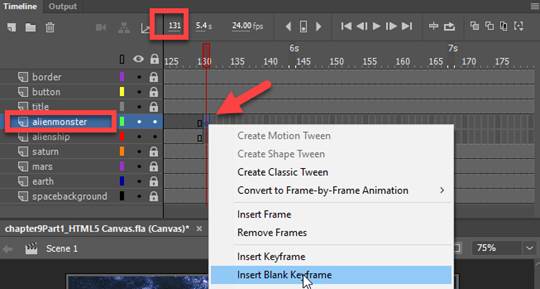
a. Go to frame 131
of the “alienmonster” layer and right click to Insert a Blank Keyframe
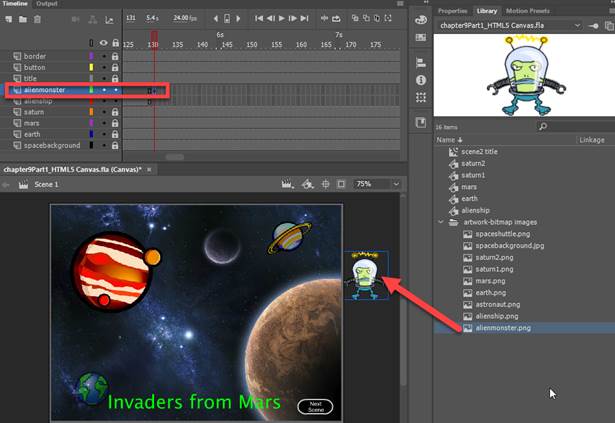
b. In frame 131 of the alienmonster layer, copy and drag the alienmonster.png
from the Library panel to outside of the stage as shown below.
 .
.
c. Right click on the bitmap image and select Convert to Symbol.
Name the symbol as “alienmonster” and select “Graphic” as the symbol
type.

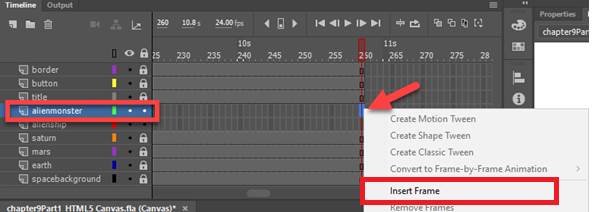
d. Go to frame 250 of the
alienmonster layer, and right click and Insert Frame
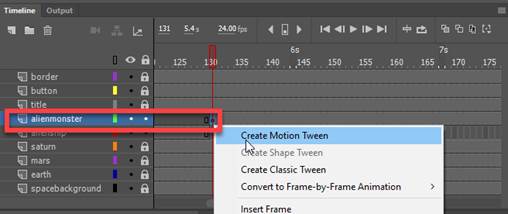
e. Go back to keyframe 131 of the alienmonster layer, right click
on select Create Motion Tween
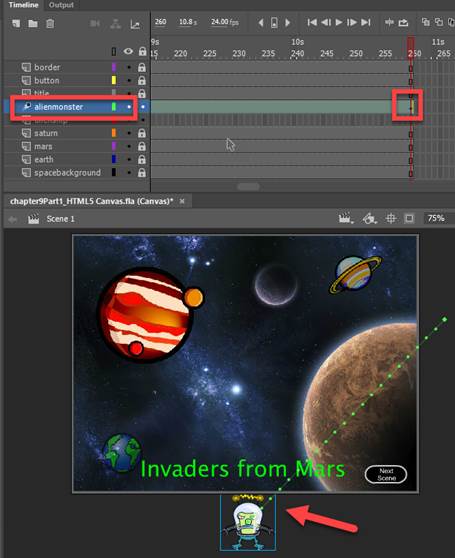
f. Go to frame 260 of the alienmonster layer. Make sure the red marker is at frame 260.
Move the symbol to the new position
off to the bottom of the stage as shown below.
Note; This will create the animation
trajectory path from frame 130 to frame 260
g. Go back to frame 130 of alienmonster layer, change the animation path
trajectory
Select the Selection Tool from
the tool bar.
Place your mouse over the path until
you see the mouse pointer with a semi-oval curve,
Drag the path towards the center of
the stage as shown below.
5. Verify your document has the
required symbols on the timeline and stage.
See attached sample of the Animate Flash output file- Chapter9Part1_output.html.
6.
Save your Animate Chapter9Part1.fla file in your chapter9 folder.
7. Publish your file in JavaScript/HTML format.
From the Main
Menu, select Publish Settings.
Select “Center Stage = Both” only
Click on the Publish button
8. Test Movie. Press <Ctrl><Enter> or from the
Main Menu, select, Control -> Test
Part 2 Requirements:
1. Open the Animate Flash file - chapter9Part2.fla
Note: Attached is a sample of the Animate Flash
output file- Chapter9Part2_output.html.
Timeline has 50 frames at
24 fps. Length of timeline is 2 sec
2. Add the layers, object
on the stage and create the frames.
a. Add 3 layers: background, line
and bouncing ball.
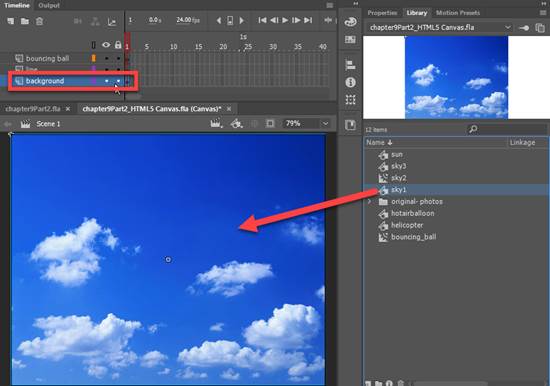
b. In frame 1 of the
background layer, copy and drag an instance of the sky1 graphic symbol from the
Library Panel onto the Stage
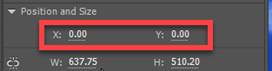
c. Select the background
symbol and in the Properties tab, change the X and Y position coordinates to
both 0.00
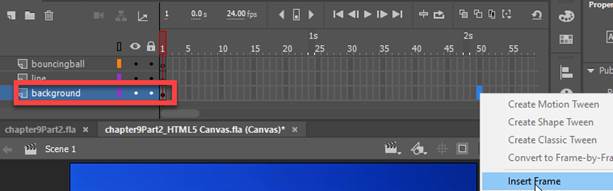
d. Go to frame 50 of the background layer and right click and then
select Insert Frames.
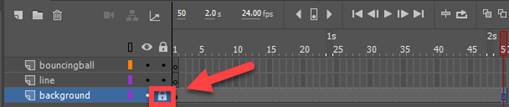
e. Lock the background layer by clicking on the lock button.
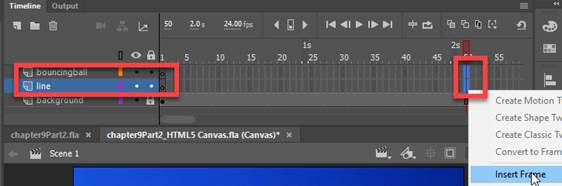
f. Go to frame 50 of the of the line and bouncingball
layer, right click and then select Insert Frames.
g. In frame 1 of the
line layer, create a line shape using Line Tool and setting up line
properties as shown below
Note: To create a straight line, hold the shift key when drawing the line.
Use the Selection Tool to select the line and group the line shape by
pressing <Ctrl><G>
Lock the line layer.
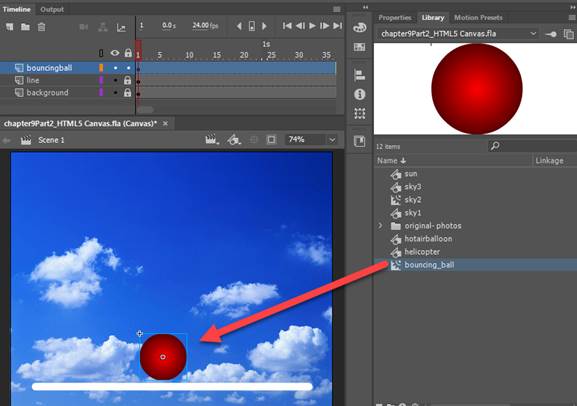
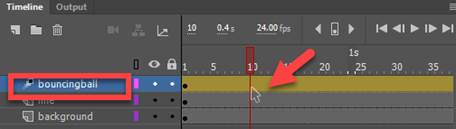
h. In frame 1 of the bouncingball
layer, copy and drag the bouncing_ball symbol from the Library Panel to above
line as shown below.
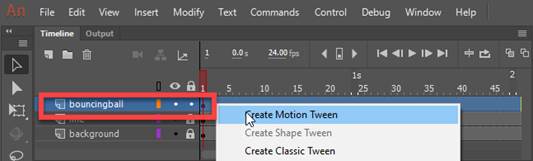
3. Create a motion tween
for the “bouncing ball”
a. Go back to frame 1 of the
bouncingball layer. Right click on the
timeline and select Create Motion Tween
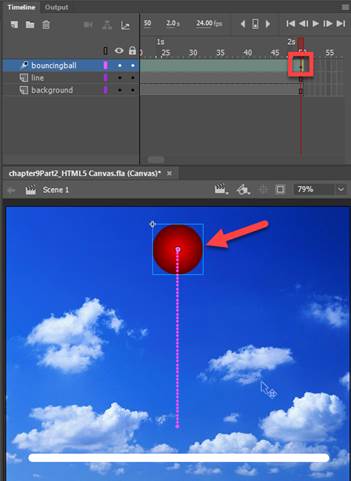
b. Go to frame 50 of
the bouncing ball layer, move the bouncingball symbol to the new position as
shown below.
Note; When moving the symbol, hold down
the shift key.
c. Go back to frame 1
of the bouncingball layer, double click on the bouncingball timeline to open
the Motion Editor.
Note: Expand the Motion Editor window if
you do not see the “Y” axis location..
Select the “Y” axis under Location.
Click on Add Ease

d. Expand the Bounce and Spring folder and select Bounce. The Easing is automatically set to 4 which 4
bounce.
e. To close the Motion
Editor, double click on the bouncing ball timeline
4. Verify your document has the
required symbols on the timeline and stage.
See attached sample of the Animate Flash output file- Chapter9Part2_output.html.
5.
Save your Animate Chapter9Part2.fla file in your chapter9 folder.
6. Publish your file in JavaScript/HTML format.
From the Main Menu, select Publish
Settings.
Select “Center Stage = Both” only
Click on the Publish button
7.
Test Movie. Press
<Ctrl><Enter> or from the Main Menu, select, Control -> Test
Part 3 Requirements:
1. Open the Animate Flash file - chapter9Part3.fla
Note: Attached is a sample of the Animate Flash
output file- Chapter9Part3_output.html.
Timeline has 150 frames at
24 fps. Length of timeline is 6.2 sec
2. Create the Motion Tween
in the hotairballoon layer and create an animation trajectory path for the
symbol.
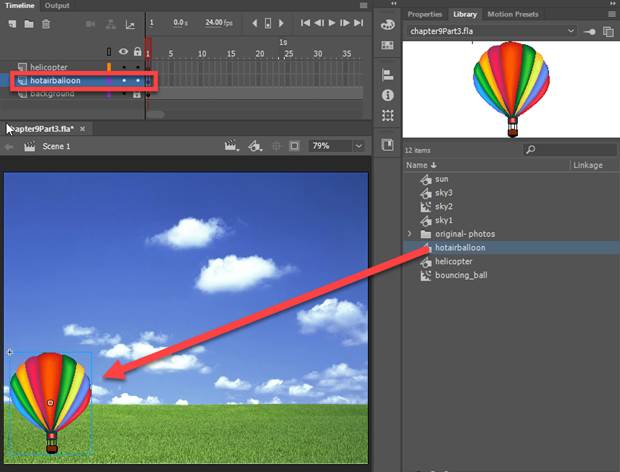
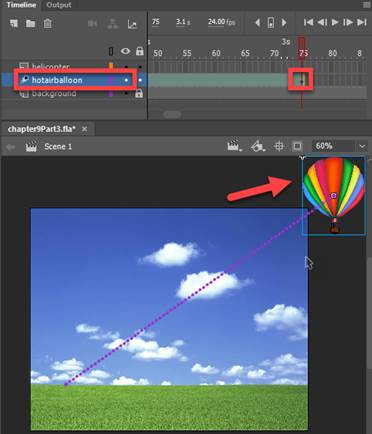
a. In frame 1 of the hotballoon layer,
copy and drag the hotairballoon symbol from the Library Panel to the stage as
shown below.
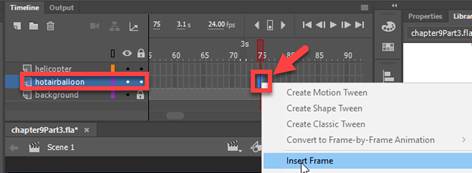
b. Go to frame 75 of the hotairballoon layer. Right click and select Insert Frames
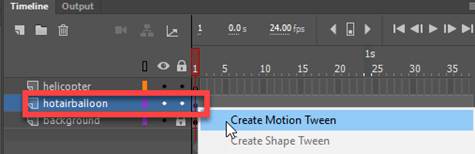
c. Go back to frame 1
of the hotairballoon layer. Right click on the timeline on the layer and select
Create Motion Tween
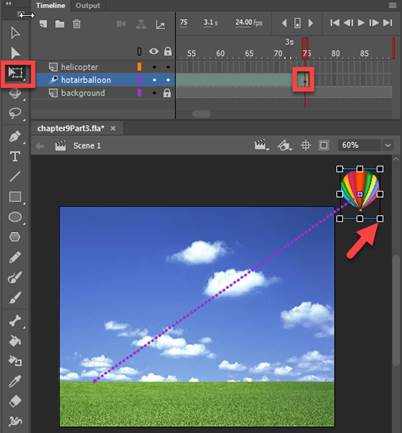
d. Go to frame 75
and move the graphic symbol to the new position as shown below.
e. Use the Free
Transform Tool to shrink the size of the symbol at frame 75.
Note; Use the bottom right handle (see red arrow)
and then hold down the shift key while shrinking the size of the symbol as
shown below.
f. Go to frame 35. Use the Selection Tool to move the
symbol a new position as shown below.
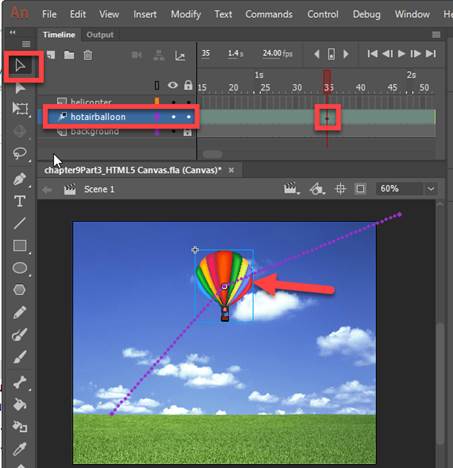
g. Stay at frame 35, change
the trajectory animation path for the hotairballon symbol from frame 1 to 35
Click on the Selection Tool
Place your mouse over the path until
you see the mouse pointer with a semi-oval curve,
Drag the path towards the left as
shown below
h. Stay at frame 35, change the trajectory animation path
for the hotairballoon symbol from frame 36 to 75
Click on the Selection Tool
Place your mouse over the path until
you see the mouse pointer with a semi-oval curve,
Drag the path towards the right as
shown below.
3. Create the Motion Tween in
the helicopter layer and create an animation trajectory path for the symbol
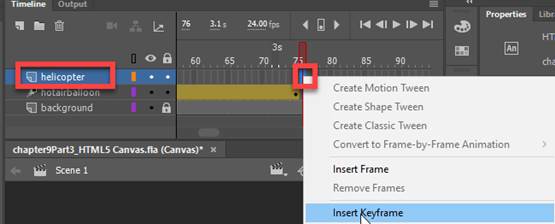
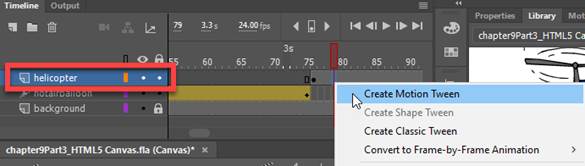
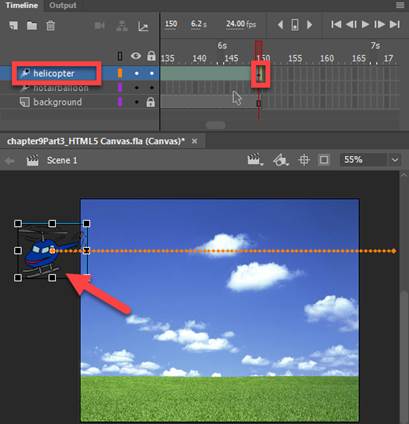
a. In frame 76 of
the helicopter layer, right click and select Insert Keyframe
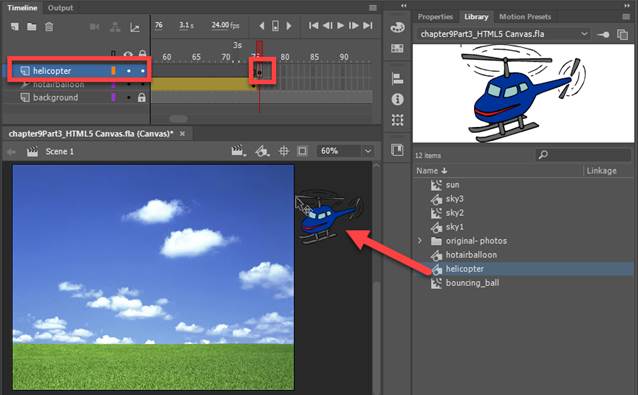
b. In frame 76 of the helicopter layer, copy and drag the
helicopter symbol from the Library Panel to off the stage as shown below.
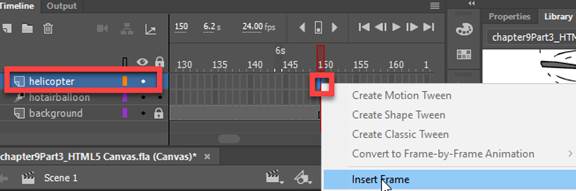
c. Go to frame 150. Right click and Insert Frame
d. Go back to frame 76
of the helicopter layer, right click on the timeline and select Crreate
Motion Tween
e. Go to frame 150 and move the helicopter symbol to the new position as
shown below.
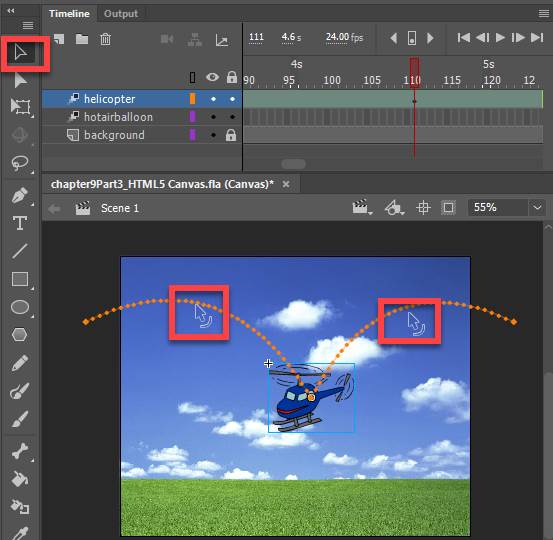
f. Go to frame 110 nand use the Selection tool to
move the symbol the new position as shown below.

g. Stay at frame 110,
change the trajectory animation path for the helicopter symbol from frame 76 to
110
Click on the Selection Tool
Place your mouse over the path until
you see the mouse pointer with a semi-oval curve,
Drag the path towards upwards as shown
below
Repeat the same steps for the other
side.
4. Verify
your document has the required animation and scenes. See attached sample of the Flash output
file- Chapter9Part3_output.html.
5. Save
your Animate Chapter9Part3.fla file in your chapter9 folder.
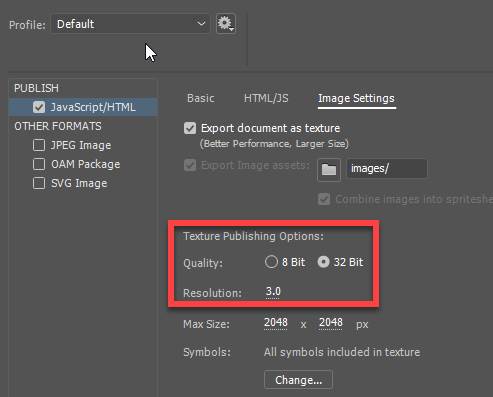
6. Publish your file in JavaScript/HTML format.
From the Main Menu, select Publish
Settings.
Select “Center Stage = Both” only
Under Images Settings, change the
quality to 32 bit and Resolution to 3.0 (see below)
Click on the Publish button
7. Test Movie. Press <Ctrl><Enter> or from the
Main Menu, select, Control -> Test
Submit:
1. Submit the screenshot of
the output result when you test the Movie
On your keyboard, press <Print
Screen> and then paste into a Paint document. Save the file as a JPG
2. Zip up your Exercise-9 folder containing the
Animate Files
NOTE: Right click on the folder and select Send to
“Compress Folder”. The file will have a
file extension of .zip.
3. Submit and upload the
screenshots and zipped up compress Exercise-9 folder to the Canvas Animate Exercise 8 drop box
|
Chapter 9 Topics |
Points |
|
1. Create a Frame-by-Frame Animation |
2 |
|
2. Create a Classic Tween |
2 |
|
3. Create a Motion Tween |
4 |
|
4. Create a Scene |
3 |
|
5. Create a Motion with 3-D
Transformation |
3 |
|
6. Animate Along a Path |
5 |
|
7. Create a Movie Clip of an Animation |
1 |
|
8. Create a Growing or Shrinking
Tween |
2 |
|
10. Create a Spinning Tween |
2 |
|
10. Animate a Mask |
2 |
|
11. Add a Button |
5 |
|
Total |
30 |